5 Notebook Workflow

5.1 Create a New Notebook
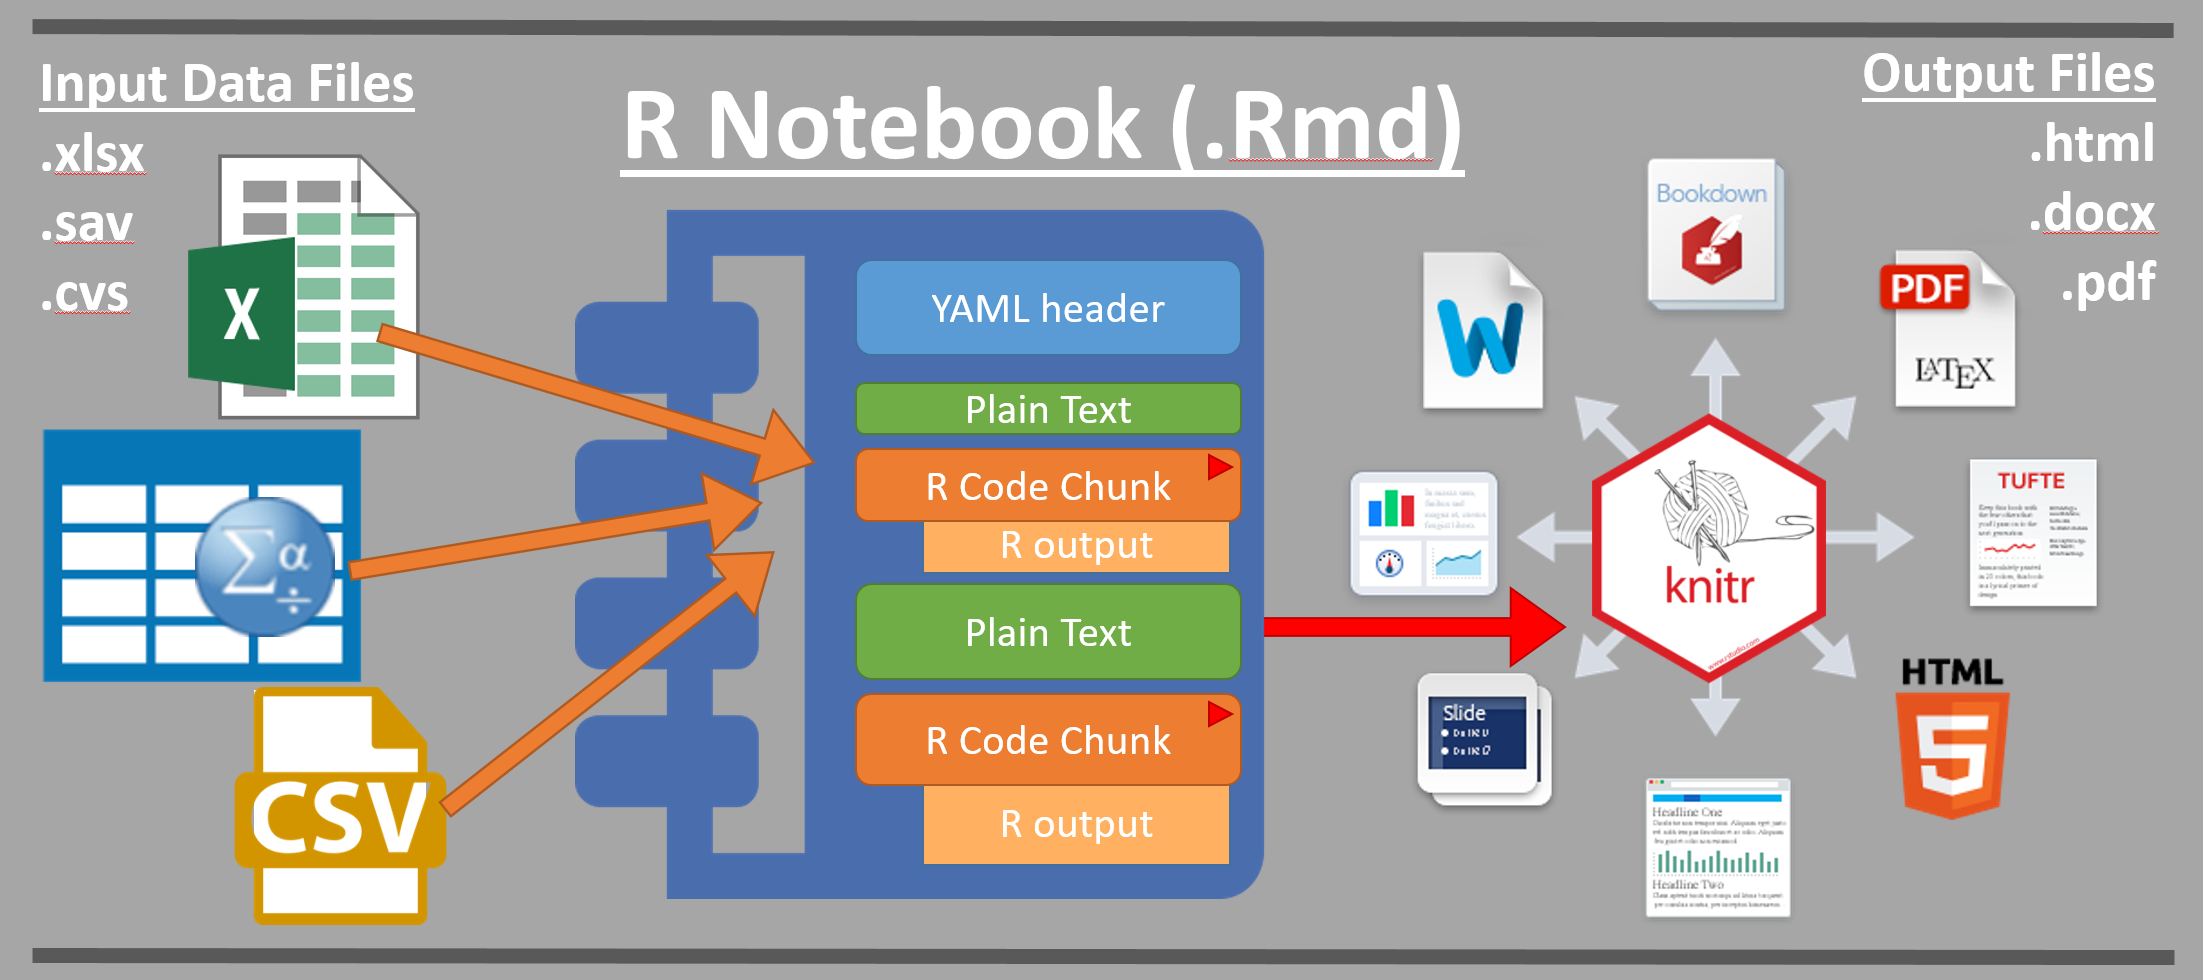
5.1.1 YAML header
YAML: YAML Ain’t Markup Language
YAML is a human-readable data-serialization language. It is commonly used for configuration files and in applications where data is being stored or transmitted Wikipedia: YAML
A YAML header contains YAML arguments, such as “title”, “author”, and “output”, demarcated by three dashes (—--) to start and end.
5.1.3 Plain Text
Simply add text below the YAML header. To start a new paragraph, you will need to end your plain text line with two (2) spaces.
5.2 Interact within a Notebook
5.2.1 Run Code Chunks
Press the “Run” button to run a chunk
Key strokes:
Run highlighted section or a single bit of code:
Windows:
Ctrl+EnterMac:
Cmnd+Enter
Run an entire code chunk:
Windows:
Ctrl+Shift+EnterMac:
Cmnd+Shift+Enter
5.3 Knit a Notebook
5.3.1 Storing all associated files
If you are using any files, such as datasets or images, they need to be stored in the same folder location as the R Notebook (.Rmd file).
This folder location must be the Working Directory for the R Studio session. If you opened your .Rmd notebook file by double-clicking on its name, then this should be the case.
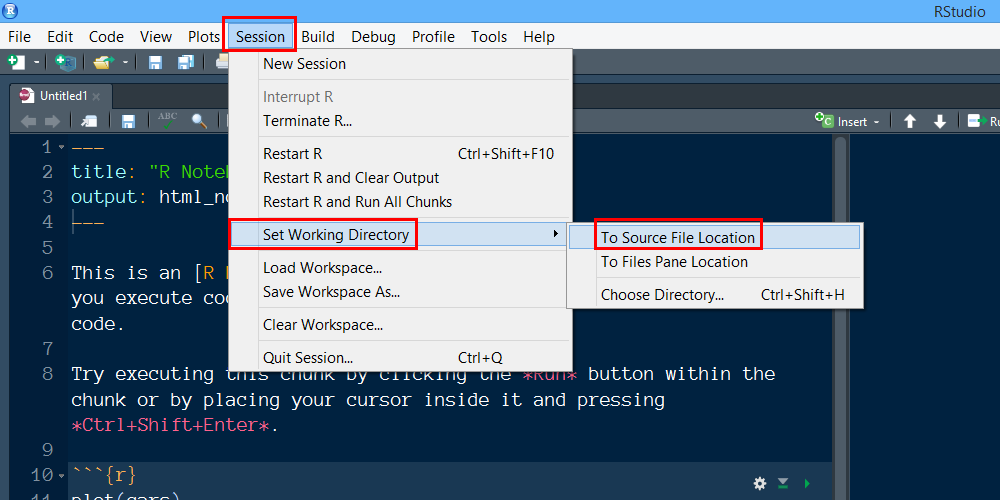
5.3.2 Setting the working directory
To ensure that R Studio knows where to find the files, you can manually set the Working Directory through the menu:
- Click
Session - Select
Set Working Directoryby hovering your mouse over it - Click on
To Source File Location
You can double check that you were successful by
- Click on the
Filestab in the many-tab panel - Click on the button with the gear that says
More - Click
Go To Working Directory
At this point you should see all the files that reside in the folder location where the open .Rmd files is also saved.
